Showing posts with label dessert. Show all posts

Thursday, July 5, 2012

Rustic Peach Pie

We had a wonderful Fourth of July!  The food was great, the weather was hot and sunny, and visiting with my family was even better!  I hope you all enjoyed your holiday, now Summer is officially here!

I've been making Pie for a very long time now.  I have mastered pie crust, and when you have a good pie crust recipe, you can make any kind of pie you want.  I have a very Easy Pie Crust Recipe that I've shared with you many times.  It's a No fail pie crust, it comes out flaky, and delicious. I would NEVER by one of those refrigerated pie crusts, they are expensive, but I use to many years ago until I tried this recipe. 

This recipe is for a Rustic Peach Pie, and it's easy, so if you're intimidated by rolling out a pie crust and crimping the edges, this Rustic Peach Pie is for you! 

No Fail Pie Crust

2 & 1/4 cups all purpose flour
1 cup shortening
1 tsp salt
1 egg
water
1 tsp. vinegar

In a large bowl put the flour and salt, and shortening, then using a pastry cutter or 2 knives cut the shortening into the flour and salt.

Using a liquid measuring cup, break one egg into it, and then fill it to the 1/2 cup line with ice cold water, and add 1 tsp vinegar.....YES vinegar......it will be fine you'll see.

 Mix it with a fork, then add it to the flour/shortening mixture and mix together with with a fork, then get your hands in there and gather the dough together don't be afraid, this pie dough recipe you can work the dough and it will still be flaky!

Form into a round disk, if it's too wet, add a little more flour, too dry, add very little water....it will be sticky, but not overly sticky.....all depends on the day and humidity.......wrap in plastic wrap and put in the frig for about 1/2 hour, or you can even leave it in there for 2 days, or freeze it for whatever pie you want.  I do believe it rolls out easier when it's not chilled for a long time, so 1/2 hour really should do the trick.

Rustic Peach Pie

1 recipe of No Fail Pie Crust
6 Peaches sliced thin
1/4 cup sugar
2 tsp cinnamon
2 TBS flour
1/2 stick of butter cubed

Slice the peaches (you don't have to peel them) into a big bowl add the sugar, cinnamon, and flour.

Take the pie dough out of the frig, and cut the disk in half, you only need half of the pie dough for this recipe, or if you want to double the recipe, go for it!

Shape the half disk into a ball then flatten with your hand.  Roll 1/2 the disk of pie dough out on a floured surface, sprinkle the flour on the surface first, then put the pie dough down, sprinkle a little more flour on top of the dough, and using your rolling pin start rolling with into a 9 inch circle. Before you add the filling, transfer the dough to a foiled line or parchment line cookie sheet.

Rolling out Pie Dough
Put the Peach filling in the center of the pie dough, dot the filling with the cubed butter.and simply fold the sides over the filling. 

Filling in the center of the pie dough!
Fold the sides over!

Make an Egg Wash: Combine 1 egg yolk and 2 TBS water in a small bowl, brush the top of the pie and bake in a preheated 350 oven for 45 minutes.  Let cool and EAT!  YUMMO!


Sunday, July 1, 2012

Counting Down to July 4th......Ice Cream Sandwich Cake!


It's been so hot here in New Jersey.  I'm not really complaining because I do enjoy the heat when it's SUMMER....not in March or in October.  Just like I enjoy snow in February, and not in OCTOBER...remember?   We've been laying low chillaxing by the pool, enjoying our lazy days of Summer.

The 4th of July is coming, and I am hosting this big Summer holiday!  My family all are coming, including my cousins I haven't seen in FOUR YEARS.....hard to believe, and I'm looking so forward to it all.  I will be cooking up a storm, something I do enjoy if you know me.

I'm going to make a new recipe, Ice Cream Sandwich Cake, I saw the recipe on Pinterest, and thought it look delicious and easy.  I make a really good Ice Cream Cake, I posted about it a couple days ago, but this recipe is something different, and I'm gonna give it a try.

Since I'm going to have a crowd on July 4th, I will be doubling the recipe, and will make it in a 9x13 pan instead of the loaf pan the directions below suggest.  I'll post about it, and include some pictures soon.  Here's the recipe, Enjoy!

Ice Cream Sandwich Cake

Ingredients
  • 1 & 1/2 cups heavy cream
  • 2 tablespoons confectioners' sugar
  • 6 ice cream sandwiches (3.5 ounces each)
  • 1/2 cup chocolate chips chops

Directions

  1. Line an 8½-by-4½-inch loaf pan with a piece of wax paper or parchment, allowing the paper to hang over both long sides.
  2. In a large bowl, beat the heavy cream and sugar until stiff peaks form.
  3. In the bottom of the pan, arrange 3 of the sandwiches in a single layer, cutting them to fit as necessary. Spread with half the whipped cream. Repeat with the remaining sandwiches and whipped cream.
  4. Sprinkle the top of the cake with the chopped chocolate chips. Cover with plastic wrap and freeze until firm, at least 1 hour and up to 1 week.
  5. Holding both sides of the paper overhang, lift the cake out of the pan and transfer to a platter.

YUMMO!

Sunday, June 17, 2012

Fresh Fruit Tart....Perfect for Summer!

I've been making this Fresh Fruit Tart for years.  My Mom use to make a similar Fruit Tart years ago for special occasions, and I loved it so, it was fresh, delicious, and pretty, and never knew how easy it was to make   I found this recipe years ago from Paula Deen, and you all know how I enjoy Paula. 


 I like to make this Fresh Fruit Tart during the Summer months, especially for Fourth of July. The crust can be made in the food processor, but I don't have one, so I simply use a pastry blender or two knives to cut the butter into the sugar and flour. I like to use strawberries, blueberries, and kiwi, and of course top it off with fresh whipped cream.  This tart is made in a tart pan where the bottom can be removed, so easy for serving!


Try this recipe, you will Wow everyone, just don't tell them how easy it is to make. Enjoy!

Fresh Fruit Tart

Crust:
1/2 cup confectioners’ sugar
1 1/2 cups all-purpose flour
1 1/2 sticks unsalted butter, chilled and cubed

In a food processor add all the ingredients and pulse until crumbed and looks like little peas. OR do it by hand and use a pastry blender, cutting the butter into the flour and sugar until crumbled and looks like little peas.


Pastry Blender
Get a Tart Pan with a removable bottom, and press all the dough into the pan, up the sides evenly, then with a fork "dock" the crust with the fork all over the crust, do this so the crust doesn't "puff up".
Tart pan with removable bottom!
 
Pressing the dough into the Tart Pan!
Before baking chill the crust for 1/2 hour in the frig. Preheat the oven to 350 and bake the crust for about 10 - 12 minutes until lightly brown. Let Cool, do not remove from the tart pan, you can decorate the tart while the crust is in the tart pan.

Filling:
1 (8-ounce) package cream cheese, softened
1/2 cup sugar
1 teaspoon vanilla extract

For the filling and topping: Beat the cream cheese, sugar, and vanilla together until smooth. Spread over the cooled crust

Topping:
Fresh strawberries, kiwi slices, blueberries
Cut the strawberries into 1/4-inch slices and arrange around the edge of the crust. For the next circle, use kiwi slices. Add another circle of strawberries, filling in any spaces with blueberries.

Glaze:
1 jar of Strawberry Jam

In a microwave heat the jam for 20 seconds, and brush the jam on top of the fruit, making sure the whole tart is covered lightly with the jam. Refrigerate for 4 hours, or overnight. Remove the tart from the tart pan right before serving.  Put on a pretty platter, and serve with a dollop of Whipped Cream YUMMO!


.


Thursday, May 3, 2012

Cinnamon Bun Cake

Well it's another rainy day here in Northern New Jersey.  It's all good, I have things to do inside the house today, and when I'm outside gardening, I feel my house suffers!  I found this really delicious cake on Pinterest the other day, yes.... I love searching for new recipes and ideas on there, if you want you can follow me at LizSomma.  
 
So I came across this Cinnamon Bun Cake, it looked really delicious, and easy. I made it last week for coffee at my friends house, and everyone LOVED it. It calls for a 9x13 pan, but I made it in 2 small square pans, one for my friends house, and of course one for home, and my family LOVED it as well.   Here's the recipe.
 
Cinnamon Bun Cake
 
CAKE:
3 cups Flour
1/4 teaspoon Salt
1 cup Sugar
4 teaspoons Baking Powder
1 1/2 cups Milk
2 Eggs
2 teaspoons Vanilla
1/2 cup ( 1 stick) Butter, melted

TOPPING:
1 cup ( 2 sticks) Butter, softened
1 cup Brown Sugar
2 Tablespoons Flour
1 Tablespoon Cinnamon

GLAZE:
2 cups Powdered Sugar
5 Tablespoons Milk
1 teaspoon Vanilla

Preheat oven to 350 degrees. Spray a 9×13 glass baking pan with cooking spray. Set aside.
In an electric or stand mixer add the flour, salt, sugar, baking powder, milk, eggs, and vanilla. Once combined well , slowly stir in the melted butter. Pour into the prepared 9×13 baking pan.
For topping, In a large bowl mix the 2 sticks of butter, brown sugar, flour and cinnamon together until well combined and creamy. Drop evenly over the batter by the tablespoonfuls and use a knife to marble/swirl through the cake.
Swirling the batter!
Bake at 350 for 35-40 minutes or when a toothpick inserted near the center comes out nearly clean.
FOR GLAZE: In a medium bowl, mix the powdered sugar, milk and vanilla together with a whisk. Drizzle evenly over the warm cake. Serve warm or at room temperature. Enjoy!
 
So YUMMO!


Tuesday, April 10, 2012

Banana Pudding Trifle!


I make this really delicious Banana Pudding Trifle, dessert.  It has homemade pudding, banana's, real whipped cream, and those Nilla Wafer cookies, layered into a big trifle bowl.  I want some now!

This recipe is so easy, and such a crowd pleaser. If you don't have a trifle bowl, just use a big clear bowl so you can see all the layers, but I have also used a 9x13 casserole dish as well. Try this recipe, you will love it!  YUMMO!


Banana Pudding Trifle

Vanilla Pudding Filling

1 2/3 cups water
3 TBS cornstarch
1 can sweetened condensed milk
3 egg yolks
2 TBS butter
1 tsp. vanilla

In a medium pot, add the water and cornstarch, whisk until combined, add the sweetened condensed milk, whisk. Separate the yolks from the eggs, be careful not to get any egg white into the yolks, it's very simple, break the egg and use your fingers to separate the eggs. Pour 1/4 cup of the water/cornstarch sweetened condensed milk mixture in the bowl of egg yolks, this is called tempering the yolks so the heat doesn't scramble the eggs, mix with a fork, and add them into the pot of water/cornstarch and sweetened condensed milk, and whisk, whisk, whisk until it thickens about 5 minutes or so, you will see it bubble up and get thick, don't let it burn, nothing like burnt pudding, keep whisking!!! Now when it's all thick and delicious looking take the pot off the heat, and add 2 TBS butter and 1 tsp vanilla. Whisk it again, until the butter is melted and let cool. I usually put a piece of plastic wrap directly on top touching the pudding so a "skin" doesn't form, put in the fridge to cool, or overnight.

Whipped Cream
1/2 pint COLD Whipping Cream or Heavy Whipping Cream (they are the same thing, but the "Whipping Cream" is CHEAPER!
1/4 cup sugar

In a mixer bowl pour the cream and put your mixer on high, add the sugar, and start mixing, I use my Kitchen Aid mixer for this, and I put a towel over the bowl so the cream doesn't splash everywhere.  Start mixing until you see soft peaks form, about 2 minutes. 

Start putting the Trifle together

You will need the Pudding, Whipped Cream, 4 Banana's, and the Nilla Wafer Cookies

On the bottom of your trifle bowl, add a heaping of the pudding, make sure to spread it out, then the whipped cream, banana's, and layer the cookies evenly.  Keep layering about 3 more times, until all the ingredients are gone, finishing with the whipped cream.  Then top the whipped cream with crushed Nilla Wafer Cookies, just crush them up in your hands over the Trifle bowl.  Refrigerate for 3 hours, or overnight.  YUMMO! 

Monday, April 2, 2012

Easter Recipes.....Ricotta Rice Pie!

I'm linking this recipe up with Walking On Sunshine, and Foodie Friends Friday. Go take a look-see!
I will be having my family here for Easter this year....and every year, no matter where we go for Easter, I make this most delicious Ricotta Rice Pie. 

This recipe was handed down to me from my Mom.  She use to make this pie every Easter, and even around Christmastime when she hosted the "Deacon's Christmas Party".  I remember it all so well, she would be cooking all week for this Christmas Party, all the delicious foods that us kids would love to eat.  On her menu was "Ricotta Rice Pie".  My sister and I loved this pie, and we were so worried we wouldn't get a piece, after the platter went around to all the Deacon's and their wives. 

Finally the time came, and the platter went around the huge table, there was at least 20 people around that large table. There we were in our P.J.'s, (yes we were very young) waiting in the kitchen for the leftover pie. Would you believe the platter was empty!  YES, EMPTY....but my sister and I enjoyed the crumbs, and they were delicious!

This pie, is so creamy from the ricotta cheese, and you don't even know there's rice in it, it's so tender.  I like to serve this with sliced strawberries and whipped cream, or you could just eat it plain.  Here's the recipe!

Ricotta Rice Pie

2 cups COOKED white rice COOLED (I use Carolina Long Grain)
2 cups Ricotta Cheese
1 & 1/2 cups sugar
5 eggs beaten
1/2 stick butter softened
1 TBS almond extract
1 pint fresh strawberries sliced, and sweetened with 1 TBS sugar
Freshly whipped cream

HINT - Cook the rice the day or night before so it's cooled down. Leave all the ingredients at room temp for about 1 hour before you start mixing, you do not want cold ingredients just won't work!

With an mixer,  beat the butter, eggs, sugar, and almond extract.  Add the Ricotta cheese and beat until smooth.  Add the rice and mix really good.

Grease a spring form pan, and add the batter, or a 9x13 dish.  Bake at 350 for about 45 minutes.  When cooled, run a sharp knife around the spring form pan, and unmold.  Put on a pretty platter, serve with fresh strawberries, sweetened with 1 TBS sugar, and freshly whipped cream! YUMMO!

Saturday, March 31, 2012

Happy Spring......Chocolate Cake!

Well, it's been a busy couple of weeks......or did I run out of recipes to post?  NEVER! 

Spring has SPRUNG here in New Jersey!  Everything is blooming, and so beautiful!  It's very early this year, and we were all surprised when the trees, shrubs and flowers started blooming, but we are enjoying it all, just got to get outside and get the yard cleaned up....so much to do, so little time.

Easter is coming next weekend, and this Palm Sunday weekend, our church choir is performing our cantata, "The Risen Christ". We've been practicing for months.  I have enjoyed it, and love singing in our church choir.  So tonight is the first performance, then again tomorrow night. 

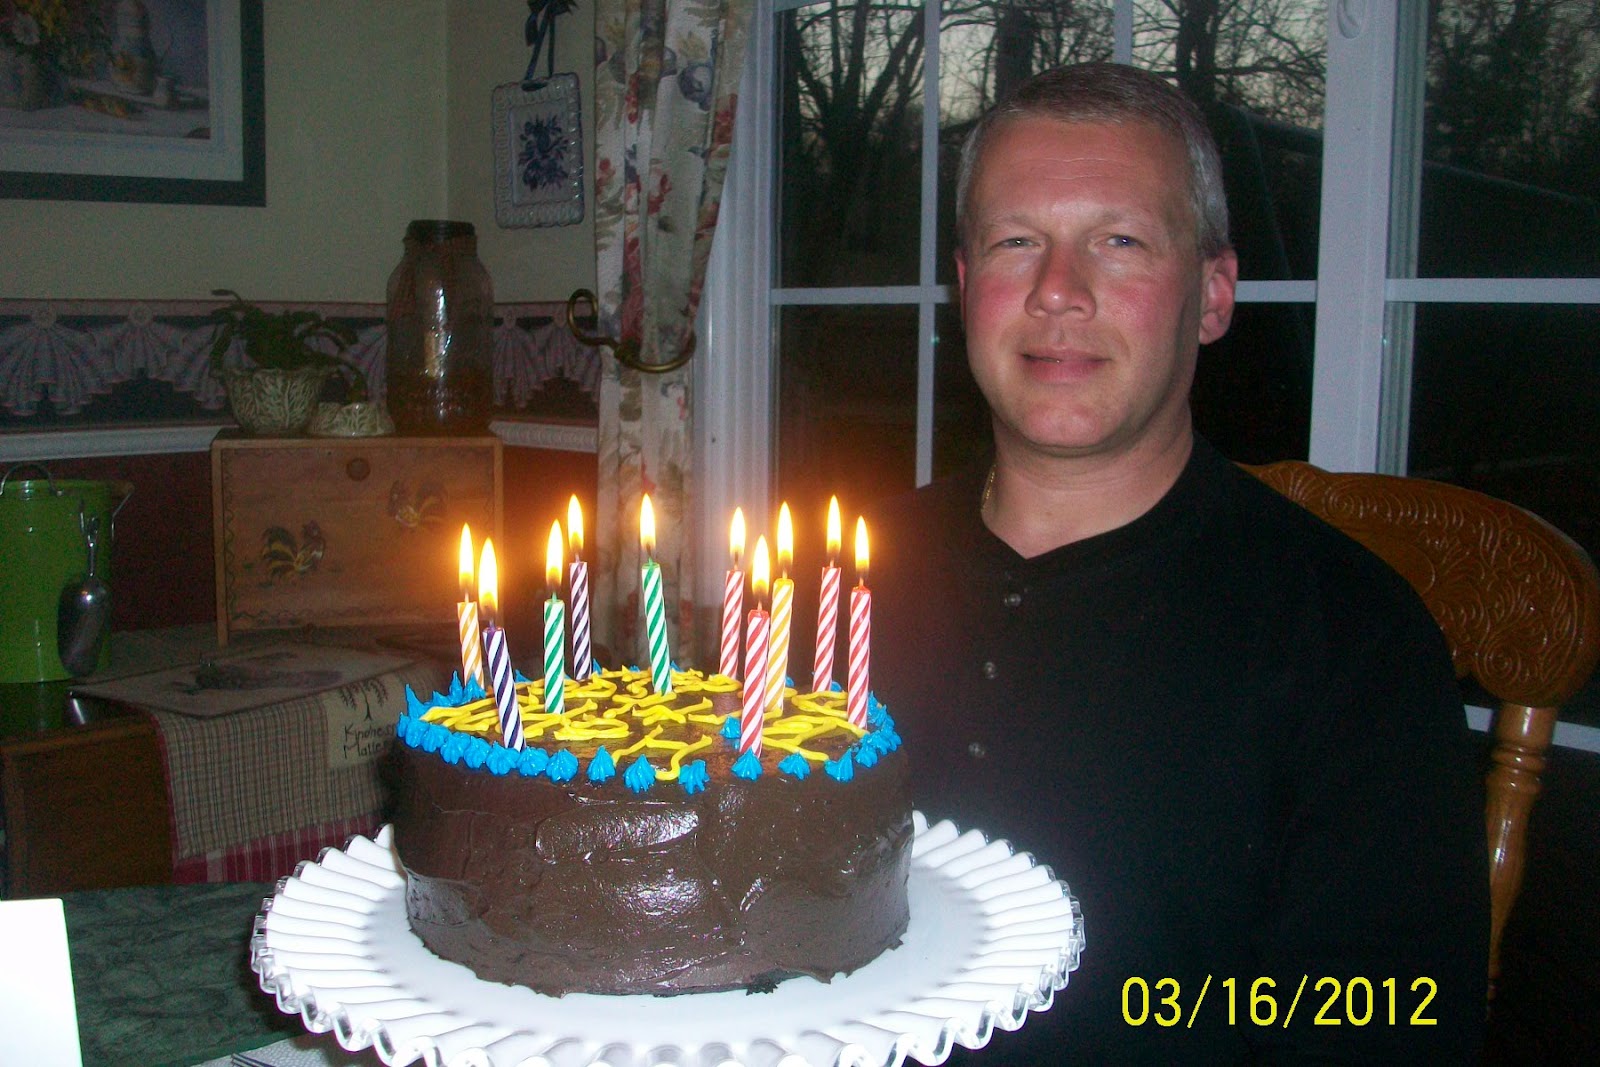
March has been a busy birthday month, my little boys birthday was on the 1st, my Hubby's on the 16th, and my Mom's 80th, on the 29th.
Davey and his Birthday cake....YUMMO!


My Hubby's Birthday Cake


 I feel like I've been baking birthday cakes all month long.  I made my "guys" their favorite, and it had to be Chocolate Cake! It's the recipe on back of Hershey's Cocoa, I've been baking this recipe for years, it is so moist, delicious, and easy. Try this recipe, you will want to mark this as your favorite Chocolate Cake, I promise!


 Hershey's "Perfectly Chocolate" Chocolate Cake

2 cups Sugar
1 & 3/4 cups flour
3/4 cups Hershey's Cocoa Powder
1 & 1/2 tsp. baking powder
1 & 1/2 tsp. baking soda
1 tsp. salt
2 eggs
1 cup milk
1/2 cup vegetable oil
2 tsp. vanilla
1 cup boiling water (YES BOILING WATER!)

Combine all the ingredients to a bowl in the order listed except the boiling water.  Mix on low at first then mix it on med-high, scrap the sides down making sure its getting mixed. Add the boiling water, and mix on low, again scrap down the sides.

 Prepare two round cake pans, flour and grease them, I like to spray the pans with cooking spray first, then lay in a round of wax paper, spray again, and flour the pans, dump the extra flour out.  Add the batter evenly, and bake in a preheated 350 for 30 - 35 minutes.

Take out of the oven, and let cool for 1 hour or even overnight.  Now make the frosting!

"Perfectly Chocolate" Chocolate Frosting

1 stick of softened butter (not melted)
2/3 cup "Hershey's Cocoa" powder
3 cups Powered Sugar
1/3 cup milk
1 tsp. vanilla
Colored Tube Frosting from the store to decorate

In a mixer cream the butter add the cocoa powder, slowing add the powered sugar, milk and vanilla.  Mix this for 2 - 3 minutes until all combined, scraping the sides down making sure it's all mixed.

Get a pretty cake stand, and put wax paper around the edges, so when you frost your cake so the frosting doesn't mess up the cake stand. Put one cake round on top of the wax paper  Put about 1 cup of the frosting on top of the cake for the filling.  Spread it all around, and top it with the other cake round.  Now start frosting your delicious cake.  Just in case you don't know how to frost a cake, it's so easy, believe me I still make a mess, I'm not perfect, but the wax paper really helps! 

Put frosting on top of the first cake, for a "filling"


Simply frost all around the edges making sure everything is covered!

Perfect, now to decorate, I use those tube frosting and tips from the store.


This is the Birthday Cake I made for my Hubby! All pretty, and EASY!


Tuesday, March 13, 2012

Easiest Ice Cream Cake EVER!!!


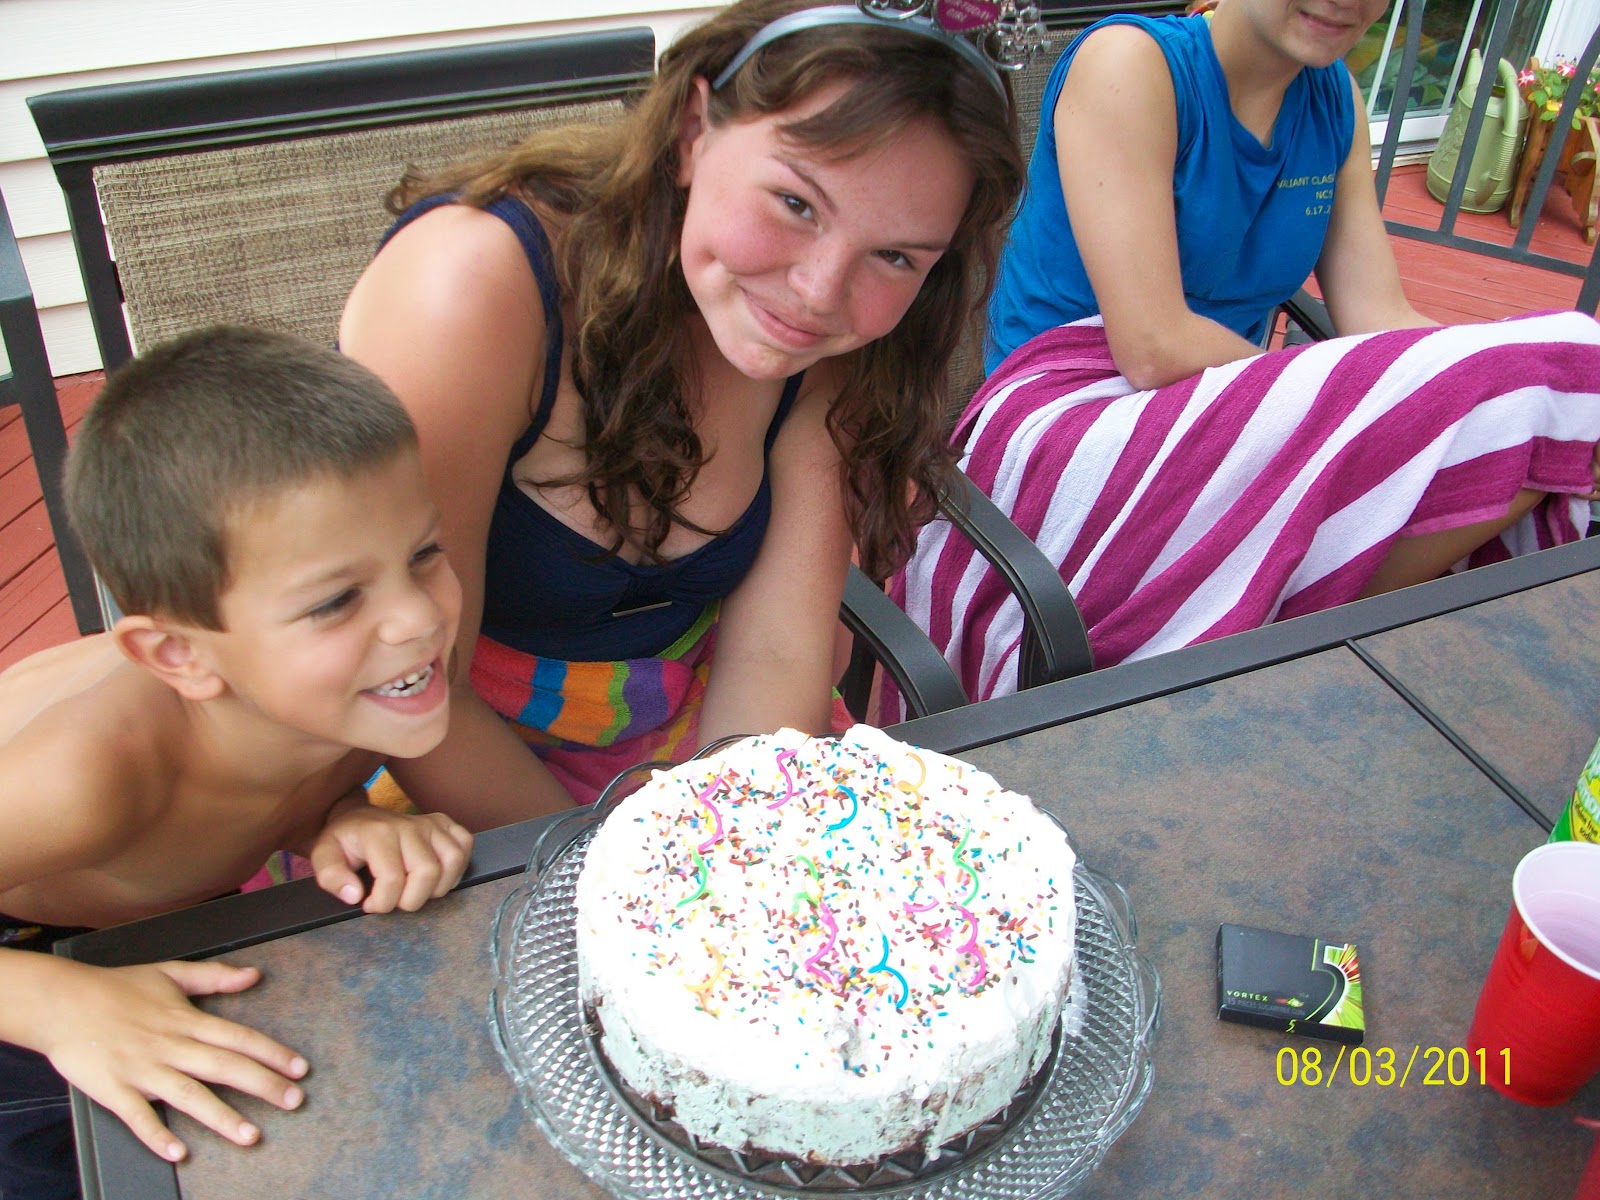
I do enjoy a good Ice Cream Cake.  I love Carvel Ice Cream Cakes, but they are so expensive!!! My Dad loved them too.  For his birthday every year, I would buy him a Carvel Ice Cream Cake, and oh how he enjoyed eating it, along with everyone else!  So one day, for my daughter's birthday, I "cloned" a Carvel Ice Cream cake.  It came out so good, and everyone loved it.  It was so easy, and CHEAP!  Next time if you want to buy an Ice Cream Cake, think about making one, they are easy, and so satisfying! 

Becca's Birthday Cake


Here's my recipe.

Ice Cream Cake

1 box of brownie mix
2 cartons of any flavor ice cream you like
2 cups of cool whip
2 cups of chocolate animal crackers crushed
1/4 cup chocolate syrup
sprinkles

I use a spring form pan when making my Ice Cream Cake, it just looks nice, but you can use a regular 9x13 pan if you wish. 

Prepare the brownie mix, and pour only HALF the batter into the greased spring form pan, and bake for about 15 minutes or until done.  You only want a thin layer of brownie, not a thick layer.  So bake the remaining brownie batter in another pan, and that is your "cooks treat".

Take the ice cream out of the freezer and let defrost while the brownie bottom is cooking, and then you have to cool the brownie bottom, too. 

I like to put the ice cream in the microwave for about 40 seconds, too.  Starting with one flavor of the ice cream, put the whole carton in your Kitchen Aid Mixing bowl, (or whatever mixer you have) and with the paddle attachment, mix it around, this softens the ice cream, and is easier to pour, and smooth out on top of the brownie bottom.

Crush the animal cracker cookies any way you want. I put them in a food processor, but you can use a plastic bag and rolling pin too.  Top the first layer of ice cream with the crushed cookies.  Wrap the bottom of the springform pan with tin foil.  Put it in the freezer for 1 hour.  After the one hour, take it out and top with the chocolate syrup, and the other carton of ice cream, (again doing the same way your did before)  Put it in the freezer overnight.  The day you want to serve the cake, top the cake with the cool whip, and sprinkles, and freeze again for 2 hours. 

When you serve the cake, run a knife around the edge of the springform pan, and loosen the ring, take it off, put the cake on a platter.  Serve and enjoy!  YUMMO!

Wednesday, January 25, 2012

Apple Turnovers!

I've always wanted to make Apple Turnovers, or "turnover" anything, and I never have....until last week.  And wow how easy, and oh so pretty were they!  I just used my "Pie Crust", which is the easiest to work with, you will never have a problem with it falling apart.  I didn't follow a recipe, I just used my imagination, and they came out beautiful, and were so delicious!  I can't wait to make a "meat turnover" filled with my Sloppy Joe Recipe, or something like that.  Give it a try, you will love them! 

Apple Turnovers

1 Recipe of my Pie Crust Recipe or go ahead if you HAVE to and buy the stuff from the grocery store :)
4 Apples peeled, cored, and cut up into little piece (you are making little apple turnovers, not an apple pie so no slices or big chunks please)
1/2 cup crasins
3 TBS Sugar
1 TBS cornstarch
2 tsp cinnamon
1 egg with 1 tsp water for egg wash
 water for sealing

Combined the apple pieces with the sugar, cornstarch and cinnamon, mix well.

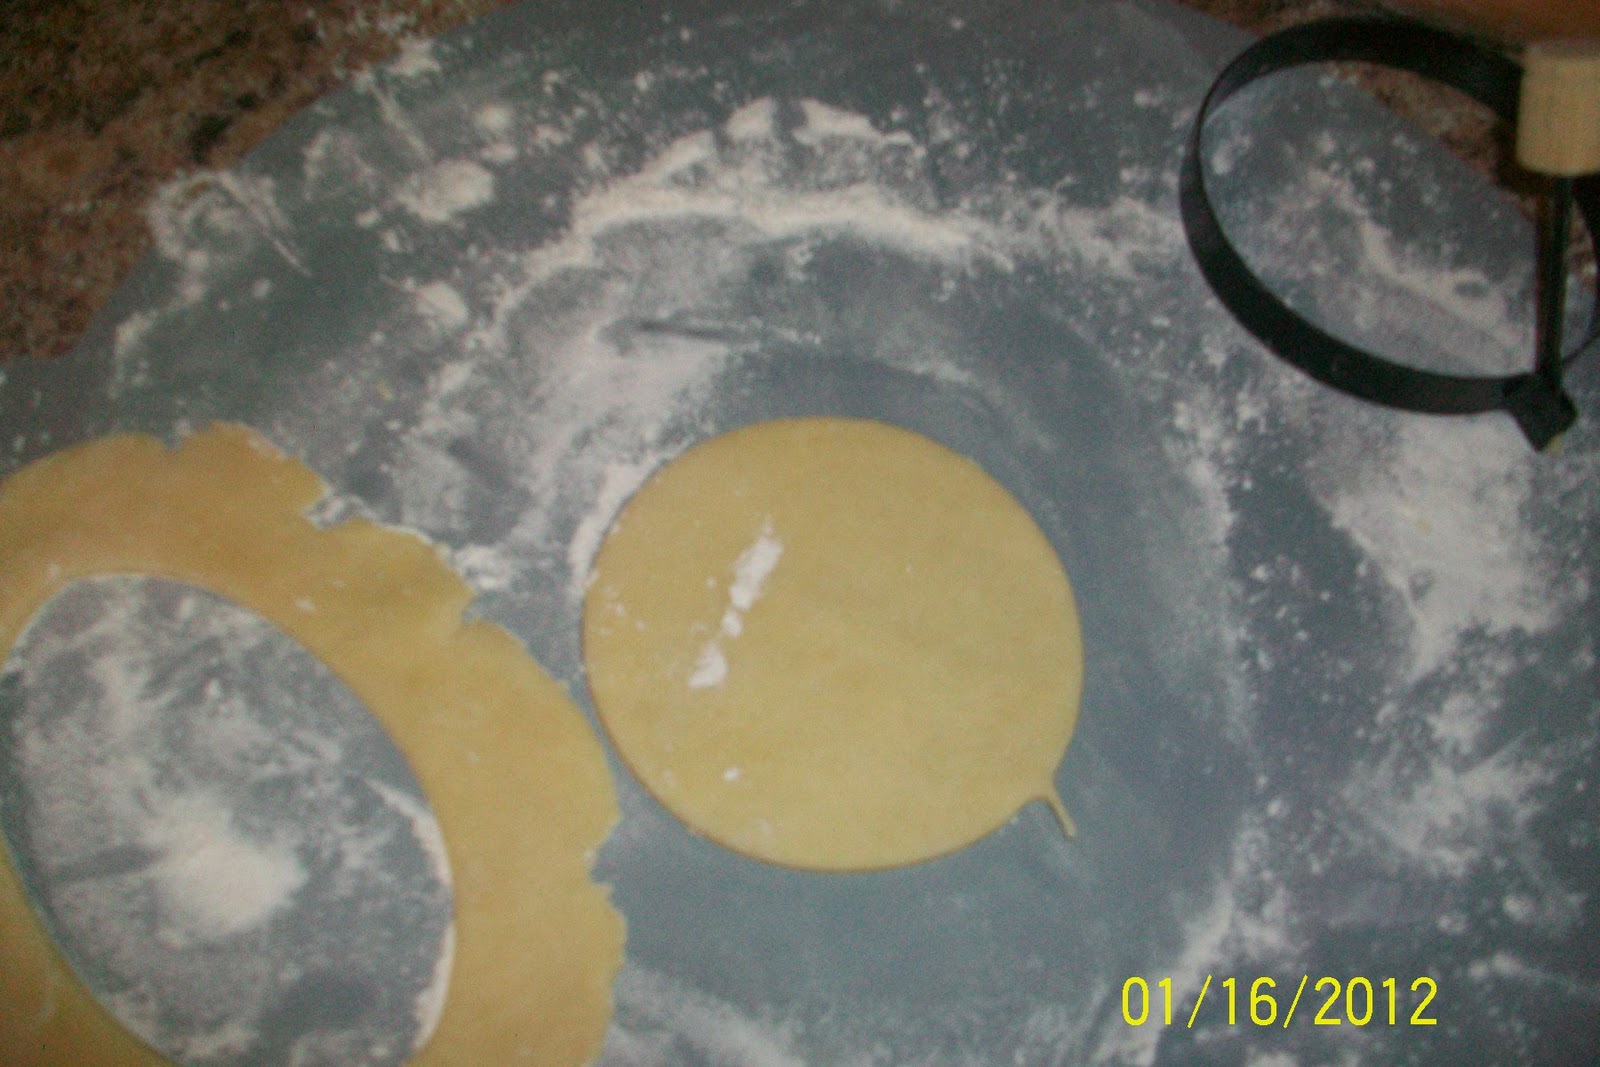
Now the Pie Crust, take the round of pie crust and cut it into 8 even pieces.  Take one piece and roll it out into a small round, but not too thick, then take like a cereal bowl or a tart cutter, and put it on the pastry and with a knife cut out the perfect circle.
Roll out dough and cut a circle out with whatever you have!

See....so easy!

Take about 2 TBS of the apple mixture, and put it on one side of the circle of pie crust, with your finger, put some water on the edges of the circle, this is like the glue! 
Fill them up!
Fold it over to make a half circle, sealing the edges, and then using a floured fork seal the edges of the turnover.....
Seal the edges with a fork!
Pick it up carefully, and put them on a parchment lined (better than foil for this recipe, but you could use foil too) cookie sheet.  Chill in the frig for 10 minutes, then brush the turnover with the egg wash, and then cut 1 slash on the top of the turnover for an air pocket.  Sprinkle with some cinnamon and sugar then bake in a 350 oven until gold brown.

HINT - I don't usually use the leftover dough, it doesn't roll out right, so when you're done rolling one Apple Turnover out, put the leftover dough to the side.  Now you'll have a bunch of pieces of the leftover dough, simply put them on lined cookie sheet, and sprinkle with cinnamon and sugar, and bake at 375 for about 20 minutes....you will have the perfect snack!  YUMMO

Tuesday, January 24, 2012

A Recipe Revisited.....Jewish Coffee Cake...The best Coffee Cake in the World!


A happy Tuesday morning to you all.  It's so warm here today, and all the snow has melted, it actually feels like Spring, but I'm NOT READY for SPRING!!!  I have a busy day going on here, and I'm going to one of my friends house for lunch along with other friends, and it's going to be a wonderful day, getting out and chatting with them all!

I'm bringing this cake to my friends house today, it's called Jewish Coffee Cake, I don't know why it's called Jewish Coffee Cake, perhaps it's the layering of the nuts and chocolate chips, with cinnamon and sugar?  I've been baking it for YEARS, and it's sure is delicious!  My good friend Cheryl gave this recipe to me long ago, and I've been making it ever since.  Try it, you will love it, and remember, don't eat the whole cake, one piece will do ya! 

Jewish Coffee Cake

2 1/4 cups flour
2 tsp baking power
1 tsp. baking soda
1 tsp salt
2 sticks butter at room temp
2 cups sugar
3 large eggs (farm fresh of course)
1 8 oz container sour cream
1 tsp vanilla
2 cup chocolate chips
1 cup chopped almonds or whatever nut you like
3 TBS sugar
1 TBS cinnamon

Cream butter, sugar, eggs, sour cream, and vanilla. Add the dry ingredients, mix well. Add 1 cup of chocolate chips and mix well.

Topping
Rest of chocolate chips
Almonds
3 TBS sugar and 1 TBS cinnamon mixed
Mix the chocolate chips, almonds, cinnamon and sugar together
Pour half the butter into a well buttered and floured bundt cake pan, Add half of the topping, pour the rest of the batter on top. Top with rest of the topping, cover every bit of batter, will look so pretty. Bake at 350 for 1 hour until a toothpick comes out clean. Cool. Invert on a cake platter so the topping is upright on the platter, it's so pretty. You can dust with powder sugar if desired......ENJOY!

Saturday, January 7, 2012

Chocolate Rolled Crescents........YUMMO!

Well, today is the day, we are finally saying goodbye to Christmas!  It takes days for me to decorate my house for Christmas, but hopefully only one day for me to say goodbye!  It's a lot of work, but glad to be getting it all done today!  The tree is so dead, needles everywhere....but it was a wonderful Christmas Season, and I am truly grateful!

Making a delicious snack for my family today, Chocolate Rolled Crescents.  I tried this recipe about three years ago, and it was a big hit with my family.  This snack is so easy, using those Pillsbury Crescents Rolls, and chocolate chips, so easy, and YUMMO! 

Chocolate Rolled Crescents

1 roll of Pillsbury (or store-brand) Crescent Rolls
About 1 cup Chocolate Chip Morsels (or mix peanut butter, white chocolate, or butterscotch morels with the chocolate, NUTS, go for it, be creative!)
2 TBS Sugar
1 TBS Cinnamon

Unroll the the crescents into individual triangles, put about 1 tsp of the chips on the widest part of the crescent, and starting with that wide end, start rolling up forming a crescent.


Sprinkle with the sugar and cinnamon mixture. Put them on a greased foil or parchment lined cookie sheet, and bake at 350 for 10 - 13 minutes until golden brown.  Take out and cool, and Enjoy! 

Thursday, December 22, 2011

Tiramisu......Perfect for Christmas!

It's all finally coming together, I see the road at the end of the tunnel.  All the cookies are baked, the Gingerbread House is made, the decorations have been up now for a while, the presents are almost all wrapped, Christmas dinner is planned, and I went shopping today, the store was CRAZY! 

We are spending the day after Christmas with my in laws, and I am bringing a dessert. I was having such a hard time deciding what to make.  So it came to me today while food shopping, I saw them....the lady fingers, yes, that's it, that's what I will make......Tiramisu!  I haven't made it in years, and everyone loves it.  This recipe is another easy one, yes you have to a make a homemade custard, don't worry, it's easy, when you learn the art of making your own custard, you can make homemade custard pies and puddings, and realize yes it is easy when I get the hang of it!  This dessert has to chill in the frig up to 8 hours or overnight, so plan for it....yes it has some steps, but hey it's Tiramisu.  Give it a try, you will love it, and you will WOW your family and friends.  YUMMO!

Tiramisu

The Custard
1 1/2 cups milk
1/2 cup sugar
4 egg yokes
2 TBS cornstarch
2 TBS butter, cut up into little pieces
2 TBS light Rum (YUM)
tspvanilla
1/2 lb Mascarpone cheese at room temp (if you can't find Mascarpone Cheese, use Cream Cheese, I have used cream cheese in the pass and really like it)

Additional Ingredients
1 1/2 cups Heavy cream -
2 TBS coffee liqueur
1 1/4 cups espresso coffee or strong brewed coffee
24 Italian Savoiardi cookies (crisp ladyfingers)
2 squares unsweetened chocolate for garnish

In a medium sauce pot on a low-med heat, add the milk, sugar, cornstarch, whisk.  Meanwhile, separate the eggs, making sure you don't have any white of the eggs in the yolks, I use my hands to separate the whites from the yokes, it's so much easier!  Put the yolks in a small bowl, mix them with a fork, and add about 3 TBS of the warm milk mixture to it, this is called tempering, this is done so the warm milk mixture doesn't cook the egg yokes.  Add that yokes mixture back to the saucepan and whisk, whisk, whisk on med-low heat until thick and starts to bubble, will take about 3 more minutes, do not let this burn! 

When all thick and bubbly, take off the heat, and add the butter in little pieces, vanilla and rum.  Whisk to combine. Put in a bowl, and cover with plastic wrap touching the pudding mixture so a skin doesn't form on top. Chill in the frig for 2 hours.  You just made Vanilla Pudding spiked with Rum...YUM!

Take out of the frig and fold in the Mascarpone or Cream cheese, making sure there are no lumps and mixed through. 

In a mixer whip up the heavy cream to stiff , yet billowy peaks form and then FOLD IN ONLY HALF of the the whipped cream into the custard mixture until all combined. Reserved the remaining whipped cream for the topping.

Whipped Cream.....YUM!

To Assemble
Mix the Espresso Coffee and the Coffee liqueur in a bowl and dip each Savoiardi cookie in the coffee mixture until some liquid is absorbed. . Arrange in a 9 inch casserole dish, or a TRIFLE BOWL, or a clear class bowl.....first one layer of the cookies, then half of the custard/cheese mixture on top of the cookies, sprinkle with half the grated chocolate, then another layer of cookies, and another layer of the custard. Ending with a evenly spread of the reserved Whipped Cream, and sprinkle the remaining grated chocolate on top.  Cover and refrigerate for 8 hours or overnight.  ENJOY!!!!!
Layering in a trifle bowl

Layering in a casserole dish


Wednesday, December 7, 2011

Mom's Christmas Cutout Cookies.......So YUMMO!!!!

We decorated the outside of our house for Christmas today, it was a long job, but so pretty!  My hubby really did most of the job, I was there to assist.  So now I can officially say the house is completely ready for Christmas. This weekend we have our first Christmas dinner with friends, and I am getting excited!

I love to bake cookies for Christmas.  I usually bake around seven different kinds. Well one year it was 14 different kinds, I know I was CRAZY!  I'm going to start the baking this Sunday after church, and everyone here will help me!  The kitchen will be a mess, there will be flour and sprinkles everywhere, but that's the way to bake cookies with kids, and I kind of wish it wouldn't get so messy, but it's an easy cleanup.  I make Christmas Cutout Cookies every year for Christmas.  This recipe is from my Mother-in-law, and it's the the best Cutout Cookie in the world.  At first the dough looks crumby when putting it together, but then you work it, and it really comes together very nice.  The dough has to be chilled, and when it comes out of the frig, it's really cold, but working it with your hands will make it easier. These cookies come out crispy, they are not a "soft sugar cookie", and they are very sweet so you wouldn't frost them with icing, that's a different kind of cutout cookie.  Try them you will LOVE them! 

Hint - I mix all my cookies with my Kitchen Aid Mixer, never by hand, so much easier, and faster! I remember the old days baking with my Mom, we would mix all the cookies by hand, my hand got tired from mixing some stiff doughs.... And I usually mix up about 3 different kinds of cookie doughs at a time, wrap them with plastic wrap, label, and put them in the frig until we are ready to use them, and it could be like 2 days later! 

Christmas Cutout Cookies

This recipe has been doubled, but I usually triple it for when I make them!
1 cup butter (Softened - NOT MELTED!)
2 cups sugar
1 tsp vanilla
2 eggs
4 cups flour
2 tsp baking powder
1/2 tsp salt

Sprinkles
2 eggs and 1 TBS water mix in a bowl for eggwash

Cream butter, then add sugar, and mix until creamy.  Add eggs, and beat until fluffy, add vanilla.  In a separate bowl combine flour, baking powder and salt.  Mix with a whisk to combine, and add slowly to the butter mixture and mix until all combined.  Take dough out of mixing bowl and shape in a disk and wrap in plastic wrap, label and chill in the frig for about 3 hours.

Take dough out of frig and working with a floured surface, take a piece off the disk and work it with your hands, it may be crumbly, keep working it, and make sure there is flour on your rolling pin and surface and roll out, not too thin, but not thick, and making sure the dough doesn't stick.  Then choose your cookie cutters, and start cutting out the cookies, re roll the dough and continue the process adding more dough to it.  Brush each cookie with egg wash and whatever kind of sprinkles you wish.

Rolling out the cookie dough


My hubby and Davey rolling out the cookie dough

See.....so EASY!!!

Put the cookies on a greased cookie sheet, and bake in the oven at 350 for 12 -18 minutes.  I like to chill the cookies right on the cookie sheets before they go into the oven, the shapes hold better.  Make sure to rotate your cookie sheets, so they cook evenly, the bottom rack will brown the bottom of the cookies and top rack will brown the top of the cookie.

Take out of the oven when they are light brown and transfer to a rack.

Not the best picture, but ME BAKING COOKIES!!!


If you want to "paint" your cookies, you can add food coloring to the eggwash....just add a couple drops to 1 cracked egg and 1 tsp water, and color, I usually crack 4 eggs in 4 different bowls, and color each bowl with a different food color, this is great "food coloring paint" and fun for the kids too, and the cookies come out looking so pretty!  But you PAINT before you BAKE!!!  Then add sprinkles and BAKE!!!!  The cookies will come out of the oven with a "painted finish" so pretty!

Mix each egg with a different food color.....mix it up and start painting then BAKE!!!

Use your imagination! Happy Baking!!!!!

Sunday, December 4, 2011

The Best Cheesecake EVER....My Mom's New York Cheesecake

I'm linking this recipe up with Robyn's View. Go take a look-see!

We have a very busy weekend, traveled to Long Island, New York yesterday for my hubby's brother's 40th birthday party, it was fun, and always good seeing the family.  Then today was church, and our Sunday School is performing their Christmas Program next Sunday, so we were all rehearsing for that, it was busy, but exciting!  Then we go to Shepherding Group the first Sunday of every month with families from our church, and that was today, we had a wonderful time sharing good food, and fellowship. WHEW.... I am tired but our weekend was wonderful spending time with family and our friends. 

My mom makes the best Cheesecake, it's a New York Cheesecake it's so creamy, and so delicious, and just SCREAMS Christmas to me!   It's very easy to make, and she's been making it now as long as I can remember. Usually Cheesecakes call for like 5 pounds of cream cheese, this recipe calls for only 3, and it still makes a large cake.  Try this recipe, so many people are intimidated by cheesecakes, it's easy, and I have a special trick to prevent it from cracking!  YUMMO!

Mom's New York Cheesecake
3 - 8 oz. cream cheese
1 cup sugar
5 eggs
1/3 cup sour cream
1 tsp. vanilla
All these ingredients must be at room temperature, including the eggs! This is a must!  So take them out of the frig and let sit on your counter for 1 hour, before you start.
Mix the cream cheese until really creamy, then add the eggs one at a time, add the sour cream, and vanilla. Scrape the sides down a couple of times, and really beat for about 5 minutes, scraping the side down yet again, until really smooth and creamy.


For the Crust, combine1 & 1/2 cups graham crackers crumbs, 1 & 1/2 Tbs. sugar, and 1 stick butter already melted.


Mix all the crust ingredients together and put them into a greased 9 inch springform pan.(if you don't have a springform pan, you could also use a 9x13 baking dish)  Lined the outside of the springform pan with foil...pat the crust into the bottom, and up the sides a bit. Bake the crust for 10 minutes in a 350 oven. Cool.

Pour the cream cheese mixture into the springform pan....put into a large baking pan (see below picture this is the TRICK for avoiding a crack in the middle) Bring about 3 cups or so of water to a boil, and gently pour the boiling water halfway up the sides of the cheesecake....into that baking dish, without getting any water into the unbaked cheesecake. This will help the cheesecake to cook evenly, and help it not to crack.


Put into a 350 oven for 45 minutes. Then shut off the oven, and let stand in the oven for another 45 minutes. Then take out of the oven and let stand at room temp for another hour. Meanwhile prepare the sour cream topping.

Sour Cream Topping -

1 & 2/3 cup sour cream,
 1/2 cup sugar,
1 tsp. vanilla.

Take the cake out of the pan of water and let sit at room temp, mix the sour cream, sugar and vanilla with a whisk, and pour on top of the cheese cake, and spread with a knife or offset spatula. Preheat oven to 350, and cook again for only 5 minutes. Take out and let sit again for 1 hour at room temp....and then refrigerate.