Thursday, September 13, 2012

Taco Pizza!


I'm linking this recipe up with Walking on Sunshine's Food Friends Friday....go take a look-see!

I made Taco Pizza a couple weeks ago when my daughter had some friends over.  It was a hit!  It was delicious, and easy, and I surely will make it again soon.

I make my own pizza dough, it's so easy, and if you have a Kitchen Aid Mixer, or a bread machine, go for it!  Here's my recipe for Homemade Pizza Dough.  (this pizza dough recipes makes 2 large pizza's).  Enjoy!


Taco Pizza

Two loaves of Pizza Dough, homemade or store-bought
1 can refried beans
1 jar salsa
1 lb ground beef cooked and drained from all fat
1 can black beans rinsed
1 envelope Mexican seasoning
2 TBS water
4 cups Cheddar Cheese or Mexican Blend
sliced black olives - for garnish
1 small can chopped chili peppers - for garnish
chopped tomatoes - for garnish
Sour Cream - for garnish

Preheat oven to 450 degrees

Brown the ground beef and drain from all fat.  Add the rinsed black beans to the beef, and the Mexican seasoning with 2 TBS water. Stir and cook for another 5 minutes on low. Let cool.

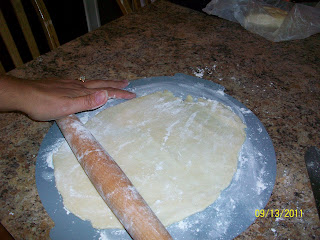
Spread the Pizza Dough on 2 GREASED large cookie sheets or stones. Make sure you let the pizza dough sit at room temp for about 1 hour before you spread it out, otherwise it won't spread easily.  Then pre-bake the pizza dough (without anything on them) in the 450 oven for about 5 minutes and no longer!

Once the pizza dough is pre-baked, take them out and start layering.  Spread the refried beans, salsa, cooked beef mixture, and cheese. 

All ready for the Oven!

Put them back in the oven at 450 for about 15 - 20 minutes being careful to rotate them so the top get crispy, and the bottom gets crispy.

Top the pizza's off with sliced olives, tomatoes, peppers, and serve with sour cream!  YUMMO!


Wednesday, September 12, 2012

Homemade Fresh Ricotta! So EASY!


What Beautiful weather we are finally having here in Northern New Jersey!  This morning when I drove my daughter to the bus stop it was a chilly 45 degrees, just beautiful!

Do you like Italian food?  Well I sure do.  I was raised on Italian food, homemade sauce, meatballs, eggplant parm, baked ziti, sausage and peppers, lasagna, you name it.  I love making it all, and usually have all the ingredients in the my frig or pantry.

I've read about Homemade Ricotta, and always wanted to try it.  So yesterday my Hubby and I gave it a try.  It was so easy, here's the recipe.

Homemade Fresh Ricotta

1 whole gallon of Whole Milk
1 tsp salt
1/4 cup Vinegar
2 TBS of Heavy Cream (if you want yours creamy, I didn't add this, but next time I will)

What you will need:

Crock Pot
Large Bowl
Large Strainer
Thin linen towel, or old clean white tee-shirt
Large spoon with wholes

In a crock pot add the whole gallon of milk, and 2 TBS of Heavy Cream you want, put the temp on HIGH, COVER, and forget about it (in my NY accent of course) for about 2 hours or so until the temp reaches 180 degrees. Check it with a thermometer after the 2 hours.

When the temp reaches 180 degrees, slowly pour the Vinegar and salt, very slowly stir for 10 seconds, keep the cover off, and forget about it for 20 minutes.  This is what it will start to look like.


Then after the 20 minutes this is what it will start to look like.  DO NOT STIR be gentle you don't want to break up the curds!


Get a large Strainer put it in a large bowl to collect the liquid known as the WHEY, and line it with a thin kitchen towel, or I used an old white tee-shirt. After the 20 minutes start carefully spooning the CURD into the strainer.


Now let the CURD strain for about 1 hour, if you like your Ricotta DRY, if you like your Ricotta a little creamy, let it strain for only about 1/2 hour.  Now you have Fresh Ricotta Cheese to make whatever you want with it.  This recipe will give you about 2 cups. 


Now you will have a lot of liquid/WHEY in the bowl, DO NOT THROW THAT OUT! Yes you can make MORE RICOTTA using the liquid. 

Take the liquid and put it into the same crock pot, you don't have to wash it, or just use a big pot on the stove, and reheat it to 200 degrees this time.  When it reaches 200 degrees, add another 1/4 cup of vinegar, and 1 tsp salt, stir for 10 seconds, and let it sit for 20 minutes again.  Strain just like before, you will get about another cup of fresh Ricotta.

Now you can throw out the leftover WHEY, or use it to do whatever you want, I have no use for it at this point, I tried to make another batch of Ricotta with it, but it didn't work. 

I will be using my Fresh Homemade Ricotta tonight for Baked Ziti.  Enjoy and So YUMMO!

Thursday, September 6, 2012

Homemade Bisquick....YES BISQUICK!!

I'm linking this recipe up with Walking On Sunshine's Friday Linky Party.  Go take a look-see!

Well we've survived the first day of school for both my kids yesterday and today.  Davey had a good day at his new school, meeting new friends, and I met new moms.  It can always be hard going to a new school for a kid and the mom. 

My daughter Becca had a great day in school.  She's in her Junior year, and I just can't believe it, where did the time go!


So the kids are back in school, it will be busy again, homework, reports, activities, and I'm excited for the school year!

I love Bisquick.....yes Bisquick!  It makes the best pancakes.  Now I've made pancakes from scratch, but I do think Bisquick pancakes and waffles are better. 


The price of Bisquick is CRAZY!  For a big box it's about $6.00......so I went online and found this "Clone" for Homemade Bisquick, I made a batch just enough for breakfast for that one morning, but you can make up a large batch and keep it in an air-tight container, and keep it for up to 2 months in your pantry or frig.  

I just don't use Bisquick for pancakes and waffles, I also use it when I'm in a pinch for biscuits, even though I like my homemade better, and for an Impossible Cheeseburger Pie recipe that my mom use to make when we were kids...I must post that soon. 

I hope you try it, it's so easy, and tastes like the real thing.

Homemade Bisquick

This recipe is enough for 3 cups of Bisquick like if you're making pancakes or waffles....when I used this to make pancakes, I had to add a little more milk to the mix for the right consistency. 

2 5/8 cup flour
1 1/3 tablespoons baking powder
1/2 tablespoon salt
1/2 cup vegetable shortening

Combine the flour, baking powder and salt in a bowl, cut in the shortening with a pastry blender or 2 knives until the mixture resembles fine crumbs. 
 
Store in an airtight container in the pantry for 2 months, or in the frig for 4 months.
 
I used this amount for when I made pancakes, see how easy it is to put together, just add the eggs and milk. 
 
Or if you want to make a big batch like a "box full"  here are the ingredients for that:
 
10 1/3 cups all-purpose flour
5 1/4 tablespoons baking powder
1 3/4 tablespoons salt
1 3/4 cups vegetable shortening
 
Follow the directions above and store in an airtight container....so EASY! YUMMO!

Use whenever your recipe calls for "Bisquick mix".

Wednesday, September 5, 2012

Twice Baked Potatoes.....


I'm linking this recipe to Walking On Sunshine's Friday Linky Party.  Go take a look-see!

Well, today is my little boy Davey's first day of school.  He was very excited today when he left the house.  He started a new school this year, and I know he is missing all his little buddies.   It poured all night long, and we hardly even got any sleep the thunder was just so loud!  When we went into his school, it was pouring buckets. When I left him, he looked nervous, and I am a little worried right now, but I know all will be well....I hope! 


He requested his favorite meal for tonight, Meatballs with Brown Gravy, over egg noodles, and corn bread! 

I made these great Twice Baked Potatoes over the weekend when we had friends over.  They are from Pioneer Woman, but of course I made them my own.  They are easy to make the day before, and just bake them off the day you want to eat them.  Try them, you will love them!

Twice Baked Potatoes

6 large Idaho Potatoes scrubbed
2 sticks butter cubed
1 cup sour cream
6 sliced bacon cooked until crispy
2 TBS chopped scallions
2 tsp Season Salt or more if you want
2 tsp freshly ground pepper
1 cup shredded cheddar cheese for the filling
1 cup reserved for the topping

Preheat oven to 350 degrees, put the potatoes on a large cookie sheet, and bake them for about 1 hour and 15 minutes, do not wrap in foil, this will make the skin crisp.

When a sharp knife can be inserted easily, the potatoes are done.  Take them out of the oven, and slightly cool.

Very carefully cut the potatoes in half, length-wise, and scoop the potatoes out into a large bowl being careful not to break the skins, and you want to leave a layer of potato left so the skin isn't so "weak", and they are kind of like "cups or shells".


Add the butter, and start mashing the potatoes, add the sour cream, season salt, pepper, cheese, it's OK to have some lumps, stir in the bacon, and scallions.  Taste it, what does it need, more salt, pepper?  Always taste your food!


Fill the potato skin "cups" with the filling, Put them in a large casserole dish or cookie sheet, and cover with the remaining cheese.  Now you can put them in the frig for overnight, or bake them right away, covered for 20 minutes, then uncovered for 10.  Enjoy! 

Thursday, August 30, 2012

I'm BACK......and Zucchini Pie!

I'm linking this recipe up with The Better Baker Linky Party.  Go take a look-see!

Well it's been almost a whole month since I've been on my blog!  Yes, I took a little vacation.  I needed a break, even though I LOVE sharing my recipes, and my life, but it can be busy. 

We went on vacation down to the Outer Banks of North Carolina, what a wonderful time we had, being right on the beach, and we had perfect weather! 

We swam everyday in the ocean, played in the sand, shopped, and just spent time enjoying each other's company.  It was a great and relaxing vacation!

Morning Sunrise in the Outerbanks!

 
My Crazy Kids!

The kids go back to school next week, and I must say this was one of the best Summer's ever spent with my Hubby and kids.  We had a full summer filled with friends, family, and activities, but I can also say we had a lot of down time too, and that is so important to me.

Our garden is dying down, we had a wonderful harvest of veggies.  The tomatoes, eggplant, peppers, not too many cucumbers, who knows why, and the zucchini were plentiful, and we love our zucchini.


Here is a great recipe to use up all the Zucchini you have in the garden.  My Mom has been making this Zucchini Pie all of my life now, and it has always been a favorite of mine.  I use my "No Fail Pie Crust" recipe, or you can just use refrigerated pie crust if you want too. 

Zucchini Pie

4 Cups Zucchini sliced very thin
1 small onion chopped small
4 eggs beaten
1/2 cup Parm cheese
1 tsp salt
1 tsp pepper
1 tsp garlic powder
1 tsp oregano
1 tsp Italian seasoning
1 TBS fresh parsley minced

No Fail Pie crust recipe, or 2 pie crust rolled out.

Combine all the ingredients in a big bowl, and stir until all combined.  Roll out half the pie crust, and put in a pie plate, add the Zucchini filling.  Roll out the other half of the pie crust, and put on top of the filling.  Make 3 slits in the top crust, and put in a preheated 350 oven for 1 hour.  Cool slightly and enjoy! YUMMO!


Saturday, August 4, 2012

No Fail Pie Crust and Strawberry Blueberry Summer Pie!


I'm linking this recipe up with Domesblissity Linky Party, go take a look-see!

I've been making this No Fail Pie Dough/Crust for years.  When my Hubby and I were newly married, my friend gave me the recipe, and promised me that it's the easiest pie dough ever!  And it was! 

This is my go-to recipe, I never buy those refrigerated pie crusts, because this is so cheap, takes little time for me, and the best part, there's nothing like rolling out your own pie crust, and making a most delicious, homemade, from scratch Pie! 

Here's my recipe for my No Fail Pie Dough/Crust. 

This recipe is very easy, so don't be intimidated. Chill the dough, but I really think the KEY for this dough is to only chill it for 20 minutes to 1/2 hour the MOST.  This dough is easy to roll out, and comes out very flaky.  Please try it!

Pie Crust for a Two Crust Pie or Two Single Pies

2 cups all purpose flour (more for rolling out the dough)
1 cup shortening
1 tsp salt
1 egg
water
1 tsp. vinegar
In a large bowl put the flour and salt, and shortening, then using a pastry cutter or 2 knives cut the shortening into the flour and salt. Using a liquid measuring cup, break one egg into it, and then fill it to the 1/2 cup line with ice cold water, and add 1 tsp vinegar.....YES vinegar......it will be fine you'll see.

Mix it with a fork, then add it to the flour/shortening mixture and mix together with with a fork, then get your hands in there and gather the dough together don't be afraid, this pie dough recipe you can work the dough and it will still be flaky!


Form into a round disk, if it's too wet, add a little more flour, too dry, add very little water....it will be sticky, but not overly sticky.....all depends on the day and humidity.  Gather into a ball, don't be afraid to work it, form into a disk, and wrap in plastic wrap and put in the frig for about 1/2 hour.


Take the dough out of the frig, and put it on a board, or whatever you roll your pie dough out on.  I use a Pampered Chef mat, that I LOVE.

Cut the circle of dough in half using a knife, then shape the 1/2 of the dough you are going to roll out back into a circle. Flour the surface, bottom and top of the dough before rolling, and on your rolling pin...start rolling out into a circle, starting from the middle, making sure you have enough flour nothing sticks.


Keep rolling take your time if it sticks add a little more flour, moving the dough so it doesn't stick, move it around after each roll with the pin.


Put the bottom pie crust in a pie plate.

Filling for Strawberry Blueberry Summer Pie
2 Pints Strawberries cut up
1 Pint Blueberries
2 Tbs flour
1/4 cup sugar
2 Tbs lemon juice
1/2 stick butter cut into little pieces
1 egg & 1 tsp water for egg wash
2 Tbs sugar for topping

Combine all the ingredients, and mix carefully.  Add the filling to your rolled out pie shell, dot with butter, and roll out the top crust. 

Carefully put the top crust on top of the filling, tuck the excess dough under the edges, making sure there's no leaks, and crimp the edges. Brush the top with egg wash, and sprinkle with sugar!
My kids.... Becca's first homemade Pie!
Enjoy!

Big Pot of Sauce and Meatballs!

Happy Saturday!  Today I'm all alone at home....not sure if I'm liking it.  My guys went on a weekend long camping trip and won't be home until Tuesday. My daughter went to our County Fair, to volunteer and face paint at our church tent.  What will I do with myself today?
Yesterday was Becca's Sweet Sixteen Birthday.  I still can't believe my little girl is 16! 

Becca and Me!
We had a little party with her closest friends, and of course I cooked.  She requested Baked Ziti, with Meatballs, and a Cookies and Cream Ice Cream Cake.  It was a nice time.  I always cook my kids favorite meal for their birthdays, something my Mom always did for me when I was growing up, and would have it no other way!

My Sauce is really easy, and delicious, and I bake my Meatballs now, so much easier than frying them.  I just started doing it this way this past year, and honestly won't go back to frying!  Enjoy the recipe.


Italian Sauce with Meatballs

3 cans crushed tomato's (I like Redpack, Tuttirusso, or Contadina)
1 onion minced
1 clove of garlic minced or 2 tsp powder garlic
1/2 cup of fresh parsley minced
1/4 cup of fresh basil
salt and pepper to taste about 2 tsp salt and 1 tsp pepper
2 TBS olive oil
2 TBS sugar (YES I use sugar to cut down on the acidity)
2 tsp Italian Seasoning
1/2 cup Parm cheese

In a big stock pot, heat up and add the olive oil, and saute the onion on medium heat, then add the garlic, but lower the heat cause you don't want to burn the garlic, nothing like burnt garlic!  Add the tomato's, careful they splash, rinse each can out with a little water, about 1/4 cup, just to get all the sauce out, add the parsley, basil, salt, pepper, sugar, parm cheese and italian seasoning. Stir with a WOODEN SPOON, I always use a wooden spoon when making homemade sauce..... bring to a boil and immediately turn down to simmer. Cook uncovered or with the lid on but not all the way, so the seam can escape, and the sauce thickens.


Now make the meatballs!

Meatballs

2 pounds chop meat (85% lean would do)
1 cup seasoned bread crumbs
1 egg
1/4 cup milk
3 TBS fresh parsley
1 TBS fresh basil
2 tsp dried oregano
2 tsp. powder garlic
2 tsp. italian seasoning
2 tsp salt
1 tsp pepper
1/4 cup Parm cheese
Mix together with your HANDS......YES... you need to do this with your hands!Roll into medium size balls. Line a cookie sheet with foil, or I still use my cast-iron skillet even for baking meatballs, and spray with cooking spray so the meatballs don't stick, cause they will. 


Bake in a 350 oven for about 15 mins, until they are nicely browned.


Add them to the already simmering sauce. 


Cook for 3 hours on simmer, or all day if you have that time.....uncovered.....yes uncovered, or if the tiny spattering of sauce on your stove bothers you, then put the lid on, but not all the way, you need the sauce to thicken and with the lid on, it will not thicken. Serve with any kind of pasta you desire, and use the leftovers for homemade pizza......


So YUMMO!

Sunday, July 29, 2012

Our Veggie Garden....and Chicken Pot Pie!

Hi everyone!  I'm linking this recipe up with Walking on Sunshine's Linky Party....Go take a look-see!

Happy Sunday!  I hope all are having a "day of rest", we try to rest on Sundays, but in the Summer months it sure is hard.  We went to church this morning, then my Hubby treated us to a breakfast out, it was nice not having to cook, and enjoyed spending the time with my family.

Our veggie garden is doing so well.  Everything is growing, and all the rain that we are getting helps, but I would rather not have so much of it!  We have about 10 Eggplant growing today, can't wait to make a batch of my "Oven-Fried Eggplant".  The Tomatoes are still green, but wow, we have so many.  There about 3 more Zucchini growing, and little tiny ones starting to grow, I have Beans galore to pick, and there's about 6 Banana Peppers to pick soon, and cucumbers, and 1 red pepper ready to be picked. The Brussel Sprouts leaves are huge, but nothing on them yet.

We did have some "pests" in the garden, bugs that is.  So we had to stay on it and spray them away!

Enjoy the pictures, I love sharing the bounty of our labor!

Zucchini!

Tomatoes!
Peppers!
Eggplant

Our "girls"....aka Chickens! And, NO, we don't eat our Chickens, only their EGGS! :)

So since I'm on the Chicken topic.....My girl Rebecca comes home today from her Missions Trip!  She's been away for a whole week.  I am cooking her favorite meal, Chicken Pot Pie, here's the recipe.  Enjoy!

Pie Crust for one pie

2 cups all purpose flour
1 cup shortening
1 tsp salt
1 egg
water
1 tsp. vinegar
In a large bowl put the flour and salt, and shortening, then using a pastry cutter or 2 knives cut the shortening into the flour and salt. Using a liquid measuring cup, break one egg into it, and then fill it to the 1/2 cup line with ice cold water, and add 1 tsp vinegar.....YES vinegar......it will be fine you'll see. Mix it with a fork, then add it to the flour/shortening mixture and mix together with with a fork, then get your hands in there and gather the dough together don't be afraid, this pie dough recipe you can work the dough and it will still be flaky! Form into a round disk, if it's too wet, add a little more flour, too dry, add very little water....it will be sticky, but not overly sticky.....all depends on the day and humidity.......wrap in plastic wrap and put in the frig for about 1/2 hour, or you can even leave it in there for 2 days, or freeze it for whatever pie you want :)
Filling

About 2 cups COOKED shredded chicken breast or whatever you like, dark or white...mine are from the STORE! (if you don't know how to cook it, cut them up in small pieces, and put a little canoa oil in a frying pan, and cook until lightly brown)
2 cups milk, 2% or whole
4 TBS cornstarch
2 cups chicken stock or 2 cups water with 2 TBS chicken bouillon added (I use the water with bouillon)
4 TBS butter (don't worry you're not gonna eat the whole pie, well maybe you will)
salt and pepper to taste
1 cup shredded cheddar cheese
2 cups mixed frozen veggies (corn, peas, carrots, whatever)

In a large pot, add the milk, cornstarch, add the water with the bouillon mixed, or chicken stock, salt, pepper, butter,.whisk constantly, but watch it, keep whisking, you don't want it to burn.....it will start to bubble and become thickened, take off heat and add cheese, stir let it melt, and then add the COOKED chicken, and veggies.. stir.....COOL... now the pie crust
The filling!
Take the pie dough out of the frig, and on a well floured surface, cut the dough disk in half, take one of the halves and roll out, this is the bottom of the pie. Make sure you have a dusting of flour on the bottom and top of the dough before rolling, and on your rolling pin...roll out to a rectangle since you will use a 9x13 dish, or a round dish if you want to use a deep round casserole dish. Keep rolling take your time if it sticks add a little more flour, moving the dough so it doesn't stick, move it around after each roll with the pin.
Rolling out the pie dough/crust....EASY, you can do it!
Put it on the bottom of a 9x13 dish, then add the cooled filling, and roll out the top pie crust the same way, lay it carefully over the filling, seal the edges, and cut three holes in the top crust for vent holes. Bake in a 350 oven for 40 minutes until you see it bubbling and light brown. Let sit for 10 minutes before serving!

Done and ready for the oven!

Complete YUMMO! Enjoy!

Friday, July 27, 2012

Summer Barley and Bean Salad!


YUMMO!
I'm Linking this recipe up with Amee's Savory Dish's Fit and Fabulous Friday's, Linky Party! It's a "healthy blog", and thought this recipe would be perfect for the party!


I love Barley. Have you ever tried it? My Mom use to make a delicious "Beef and Barley Soup", when I was growing up, and I loved it. I have found a new love for Barley, you can cook it just like pasta in boiling hot water, but for about 40 minutes, instead of like 7 minutes for pasta. Barley is a grain and needs to cook longer, but when it's done, it's so delicious, so tender, and perfect for a Summer salad, or better yet a Summer Bean and Barley Salad.

Doesn't this look DELICIOUS!!!

Barley is very how on the glycemic index, you know foods that are low in carbs, and won't raise your blood sugar. This is perfect for me. I like to substitute Barley for rice in dishes and you know, I do not miss the rice at all.

Try this salad, you will love it, and start eating Barley!

Summer Bean and Barley Salad

2 stalks of celery chopped small
1/2 red onion minced
1 whole cucumber peeled and chopped small
1 can Red Kidney Beans drained and rinsed
1 can Garbanzo Beans (Chick Peas) drained and rinsed
1/2 cup grape tomatoes quartered
3 TBS chopped fresh Parsley
1 cup cooked Barley


In a stock pot bring water to boil, salt it and add the uncooked Barley just like you were cooking pasta, cook for about 1/2 hour stirring once in a while. After 20 minutes test the barley taste one, and see how soft it is, does it have to cook longer, or is it soft. Barley should be soft, but not mushy.

Cooked Barley!

Drain the water and rinse the barley in cold water, you do not want it hot at this point.

In a big bowl, add all the chopped veggies, beans, parsley, and add the barley.

I usually make my own Italian Dressing, but I also use Good Season's Italian Dressing the kind in the packets where you add the oil, vinegar and water, it's really good!

Homemade Italian Dressing

1 cup of olive oil or canola oil
1/4 cup cider vinegar or balsamic vinegar
1 tsp, oregano
1 tsp. Italian seasoning
1 tsp. garlic powder
1 tsp. onion powder
1 tsp. salt
1 tsp. ground pepper
1 TBS sugar
1 TBS spicy brown mustard (yes it makes the dressing!)

Mix all the ingredients together with a whisk, or put in a jar and shake really well. Now taste it, what does it need, more salt, pepper, or sugar? Add it, always taste your food!

Toss the Bean Salad with about 1/4 cup of the Italian Dressing, chill for about 1 hour. Enjoy!

YUMMO!

Thursday, July 26, 2012

Move Over Red Lobster....Delicious Cheese Biscuits!

I'm linking this recipe up with Walking On Sunshine, and Foodie Friends Friday. Go take a look-see!

Biscuits, I just love them!  But I always had a problem with making them, they would never come out right, and I've tried different recipes over the years! Well, 20 years later, I have perfected Biscuits!  They are just like the Biscuits from Red Lobster, but better, because they are HOMEMADE! I use butter in this recipe, and cheddar cheese, and you don't have to "cut" cold butter into the flour mixture, you melt the butter, and it's SO EASY!

Delicious Cheese Biscuits
2 cups flour
1 tablespoon baking powder
1 tsp. Kosher salt
1 teaspoon onion powder
1 tsp. Italian seasoning
1 cup milk
1/2 cup butter, melted
1 cup shredded Cheddar cheese

Directions

Heat the oven to 375 degrees F.
In a large bowl add the flour, baking powder, 1 teaspoon of salt, and onion powder, and Italian seasoning. Mix to blend then make a well in the center of the bowl and add the milk, butter, bacon and cheese. Mix gently with a wooden spoon. The dough will be wet and sticky. Using a 1/4 cup measure or ice cream scoop, portion the batter onto a GREASED baking sheet, leaving an inch or so around each biscuit.

Bake in the oven until the biscuits are golden brown and a toothpick inserted in the center of one comes out clean, 20 to 22 minutes. YUMMO!

Wednesday, July 25, 2012

Zucchini Pancakes!

I'm linking this recipe up with Walking On Sunshine, and Foodie Friends Friday. Go take a look-see!
We havested about five Yellow Zucchini already.  I love Zucchini, and this year we made a mistake and only planted Yellow Zucchini, but it's okay, because they are just like the green to me, only yellow.

I love Zucchini, last year we only harvested ONE from our garden. We got a terrible BUG, and the plants all died one after the other.  It was very sad!  So this year we are excited that our Zucchini plants are producing, and doing well.


Fresh from the Garden!
So, I went onto my Sister's blog, and found her recipe for Zucchini Fritters.I made them this past weekend, using up two of the Zucchini.  Of course I added my own touches to this recipe, I can never follow a cooking recipe. The "Fritters" didn't come out like "fritters", but more like pancakes, but they weren't flat, but just right!  My family loved them, especially my daughter Rebecca!

Zucchini Pancakes

3 cups zucchini grated
2 eggs lightly beaten
1 small onion minced
1/2 cup grated Parmesan cheese
2 cups flour
1 tsp baking powder
2 TBS parsley, minced
1 tsp salt
2 tsp dried oregano
1 tsp garlic powder
1 tsp onion powder
1/2 tsp. ground pepper
1/2 - 1 cup milk
Oil for frying

Peel the Zucchini's then grate them.  Chop the onion.  In a large bowl add the flour, baking powder all the herbs, parmesan cheese.  Whisk to incorporate.  In a measuring cup, add 1/2 cup  milk and 2 eggs and beat with a fork, then add to the dry ingredients.  Add the Zucchini and mix....now at this point, you may have to add more milk, is the batter too dry?  If so add a little more milk like 1/4 cup.


Heat up a skillet and add about 3 TBS oil, I use Canola Oil. 

 Make sure the skillet is nice and hot. 

Drop the batter into the hot skillet and let cook for about 2 minutes or so before flipping


And flip, and cook about 1 minute more.....

Notice my Black Cast Iron Skillet! Guess it's an antique, I bought it like 20 years ago, when they weren't "cool".....


I added a little bit more oil after each frying. 

Serve the pancakes HOT....but they taste great right out of the frig too!


 We enjoyed applesauce, and apple butter as a topping for our Zucchini Pancakes. 

They were so delicious!  YUMMO!